Can You Mix Different LVP Styles in One Home?
Yes — if you follow three rules. Here's when mixing LVP styles room to room works beautifully, when it backfires, and how to handle transitions like a pro.
Short answer: Yes, you can mix different LVP styles in one home — and many of the best-looking projects we install do exactly that. But mixing only works when it looks intentional, not accidental. Three rules govern the difference: contrast with purpose, control your sightlines, and use the right transition strip. Get those right and a mixed-LVP home reads as designed. Get them wrong and it reads as leftover material.
When mixing LVP styles works beautifully
Room-by-room zoning
The most common — and most successful — way to mix LVP is one style per room. A cool gray wide-plank in the kitchen, a warm honey-toned oak in the living room, a deeper walnut in the primary bedroom. Each room reads as its own space, the way a tailored suit fits each piece to its purpose. This works especially well in older floor plans where rooms are visually separated by doorways, walls, or short hallways.
Open-plan definition
In an open-concept floor plan, mixing LVP can do what walls used to do — define zones without closing them off. A wider, lighter plank in the great room and a narrower, slightly darker plank in the adjacent dining nook quietly signals "this is a different space" without anyone having to think about why. Designers have used the same trick with rugs for decades; LVP just makes it permanent.
Functional areas
Mudrooms, laundry rooms, garages-turned-flex-rooms, and basements are perfect places to drop down a tier. A more utilitarian LVP — textured, darker, or simply a lower-cost line — handles muddy boots and washing-machine leaks without dragging down your premium living-area floor. You spend the design budget where guests see it and the durability budget where life happens.
When mixing LVP backfires
Mixing fails in predictable ways. Watch for these traps:
- Too many styles in one sightline. If you can stand in one spot and see three different LVP colors or patterns, the eye reads chaos, not curation. Two visible styles is the cap.
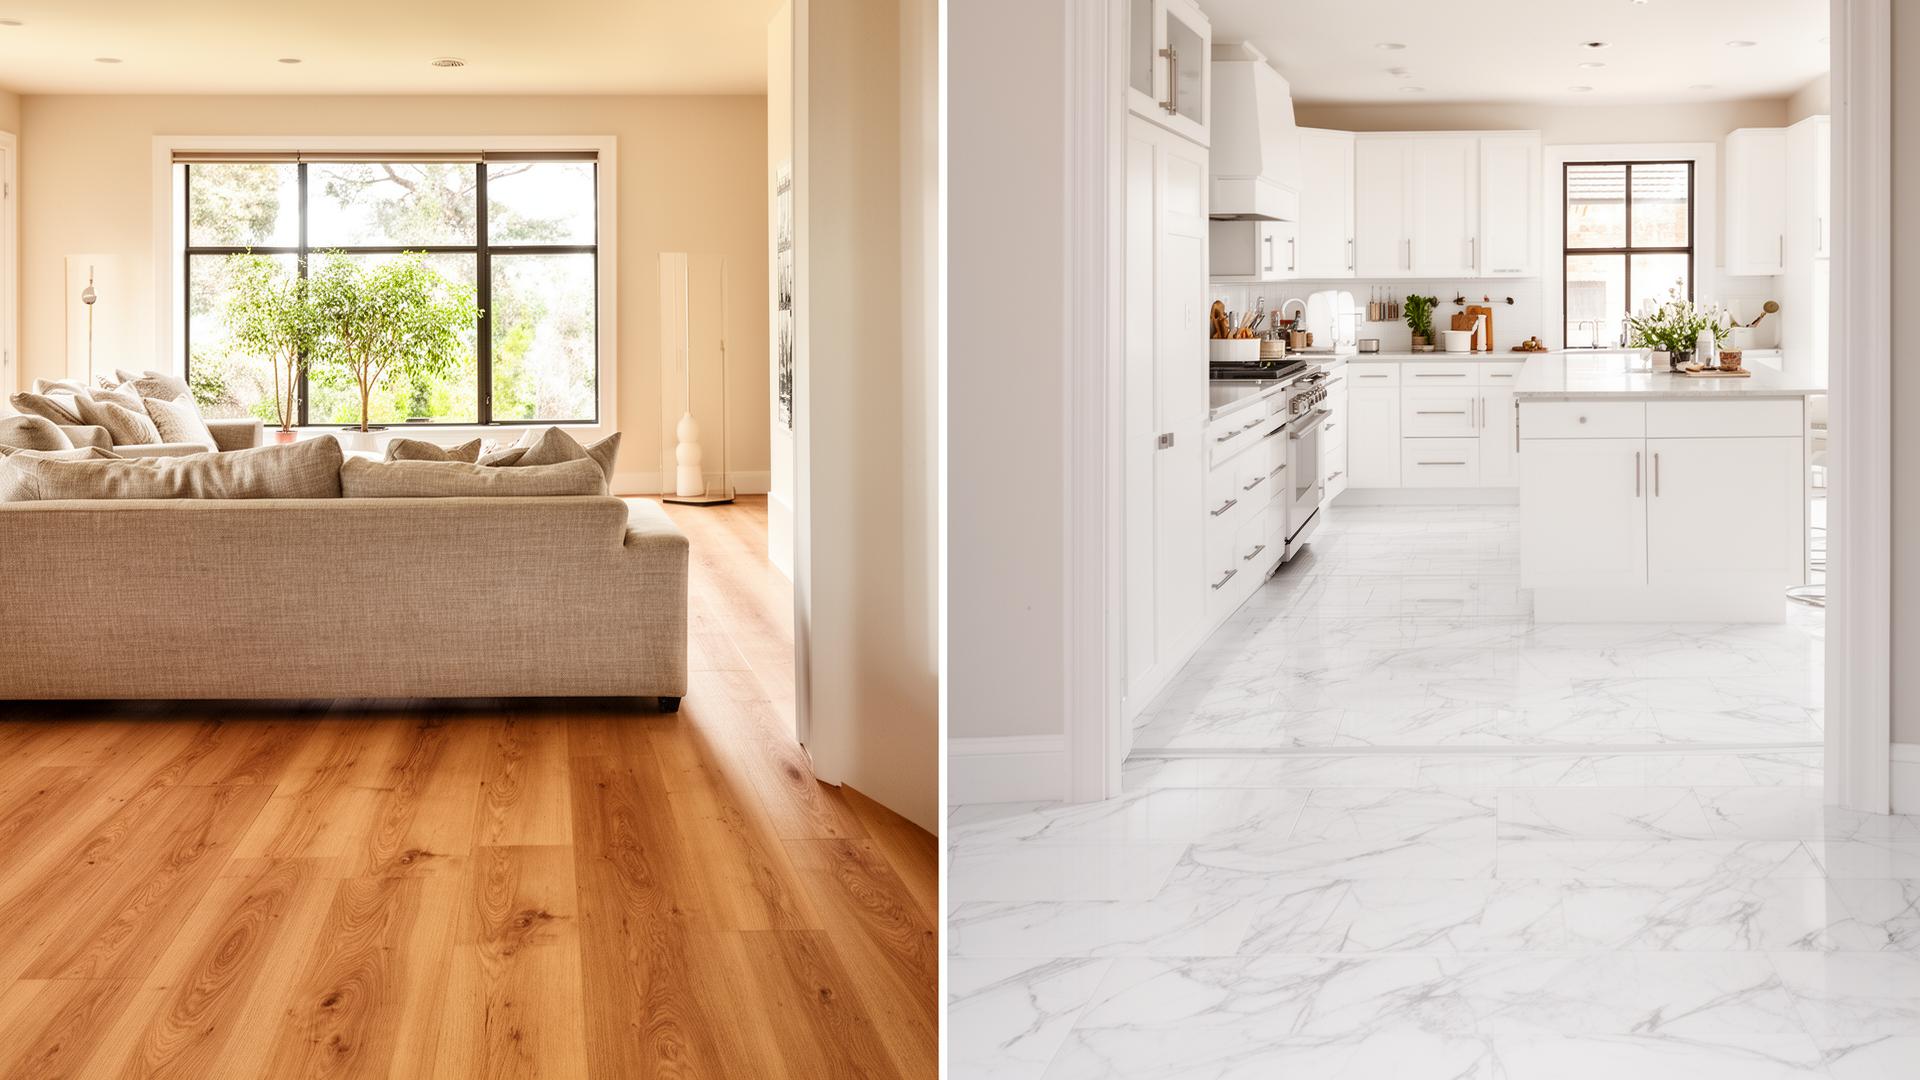
- Clashing undertones. A warm honey oak next to a cool ashen gray creates visual tension — both planks may be gorgeous on their own, but together they fight. Stick to the same temperature family (all warm or all cool) unless you're deliberately using contrast as a feature.
- Ignoring plank width. Mixing 7-inch wide planks with 5-inch planks in an open space makes the floor feel broken up. If widths are going to change, change them at a clear doorway or transition — not mid-room.
- Random butt joints. Two different LVP styles slammed together with no transition strip looks like a mistake, not a design choice. The eye reads it as "they ran out of material."
The three rules for mixing LVP successfully
Rule 1 — Contrast with purpose
The difference between two LVP styles should be meaningful: light vs. dark, wide vs. narrow, smooth vs. hand-scraped, matte vs. low-gloss. Similar-but-different shades in adjacent rooms is the worst of both worlds — it just looks like a batch mismatch instead of a design choice. If you can't tell whether two samples are meant to be the same or different, pick one or commit to a clear contrast.
Rule 2 — Control the sightline
Stand in the doorway of every room and look around. Count the LVP styles visible from that one spot. Two is the limit. If three are visible, your floor will feel busy no matter how nice each individual plank is. This is why room-by-room zoning works in closed floor plans but needs more discipline in open ones — every doorway becomes a sightline test.
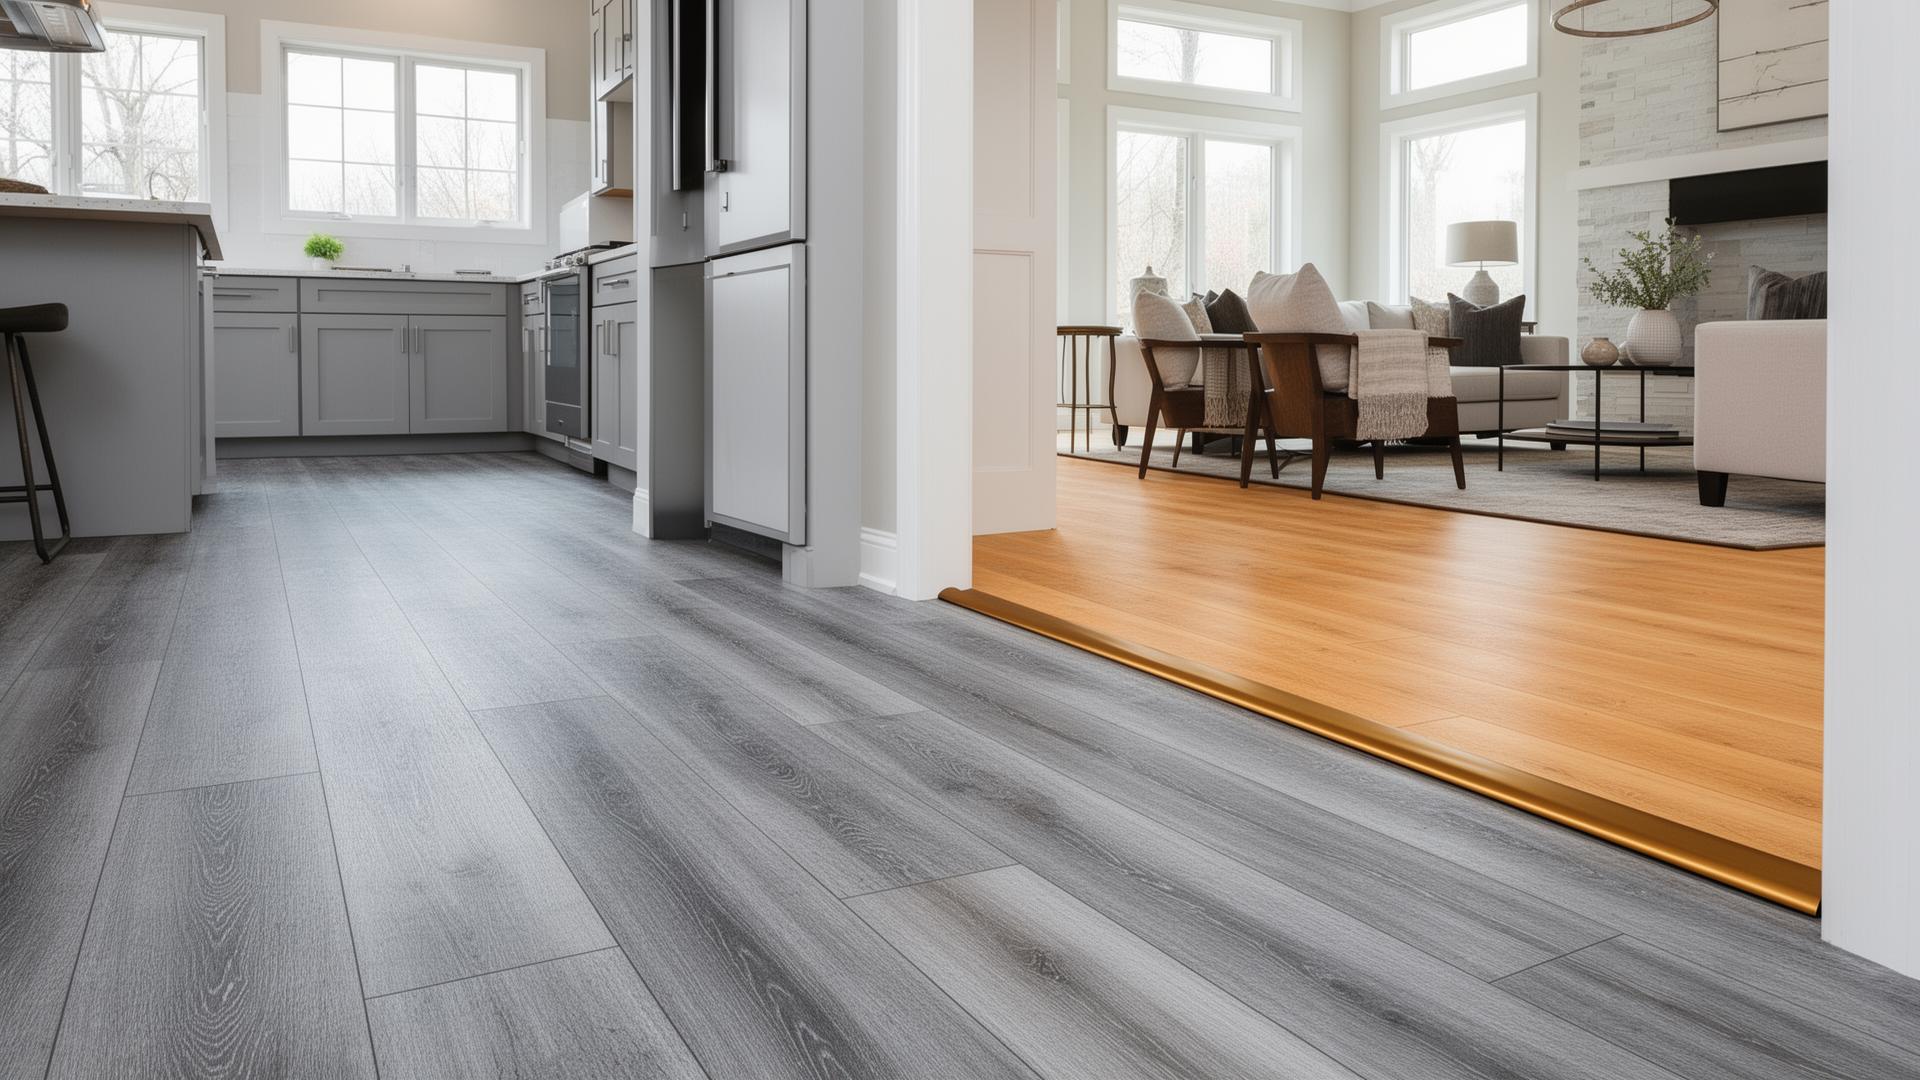
Rule 3 — Use a proper transition
Wherever two different LVP styles meet, install a real transition strip. T-molding, a reducer, or a decorative metal threshold signals intention and protects the joint from expansion movement. Butting planks together with no transition is almost always a mistake — both visually and mechanically, since LVP needs room to expand and contract.
Transition strips for LVP, explained
- T-molding — for two floors of the same height. The most common LVP-to-LVP transition. Bridges the expansion gap and visually marks the change.
- Reducer — for a height difference, like LVP meeting tile or a thinner laminate. Tapers smoothly so no one trips.
- Stair nose — for steps. Caps the leading edge of each tread.
- Decorative metal or wood strips — for intentional design breaks. A bronze or matte black inlay between two LVP styles turns a transition into a feature.
Whichever strip you use, your installer must leave the proper expansion gap on both sides. Skipping that gap is one of the most common installation mistakes and causes buckling later.
Room-by-room mixing ideas that work
- Kitchen → living room: Waterproof LVP in the kitchen, slightly warmer LVP in the living room, T-molding at the doorway.
- Hallway branch rule: Keep hallways neutral and consistent — let the rooms branching off them carry the personality.
- Bedroom suite consistency: Match the LVP across the bedroom, walk-in closet, and en-suite hallway so the suite reads as one space.
- Bathroom adjacency: A dedicated waterproof LVP in the bathroom, transitioning through the door into the bedroom's softer style.
Plan your transitions before you order material
Mixing LVP isn't just a design conversation — it's a measurement, ordering, and installation conversation too. Each style needs its own waste-factor allowance, each transition strip needs to be sourced (often from the LVP manufacturer to color-match), and your installer needs to plan where each plank run starts and stops. We work this out for you during the in-home measurement, so nothing gets ordered short and nothing gets butted together that shouldn't be.
Browse our published rates on the pricing page to see what mixed-LVP installations cost per square foot, or book a measurement and we'll walk through your floor plan room by room. Our installers do this every week — including the leveling work that mixed thicknesses sometimes need.
Keep reading
Know your flooring cost in 60 seconds.
Use our published rates to get an itemized estimate — no phone calls, no sales pressure.
Keep reading
All articles →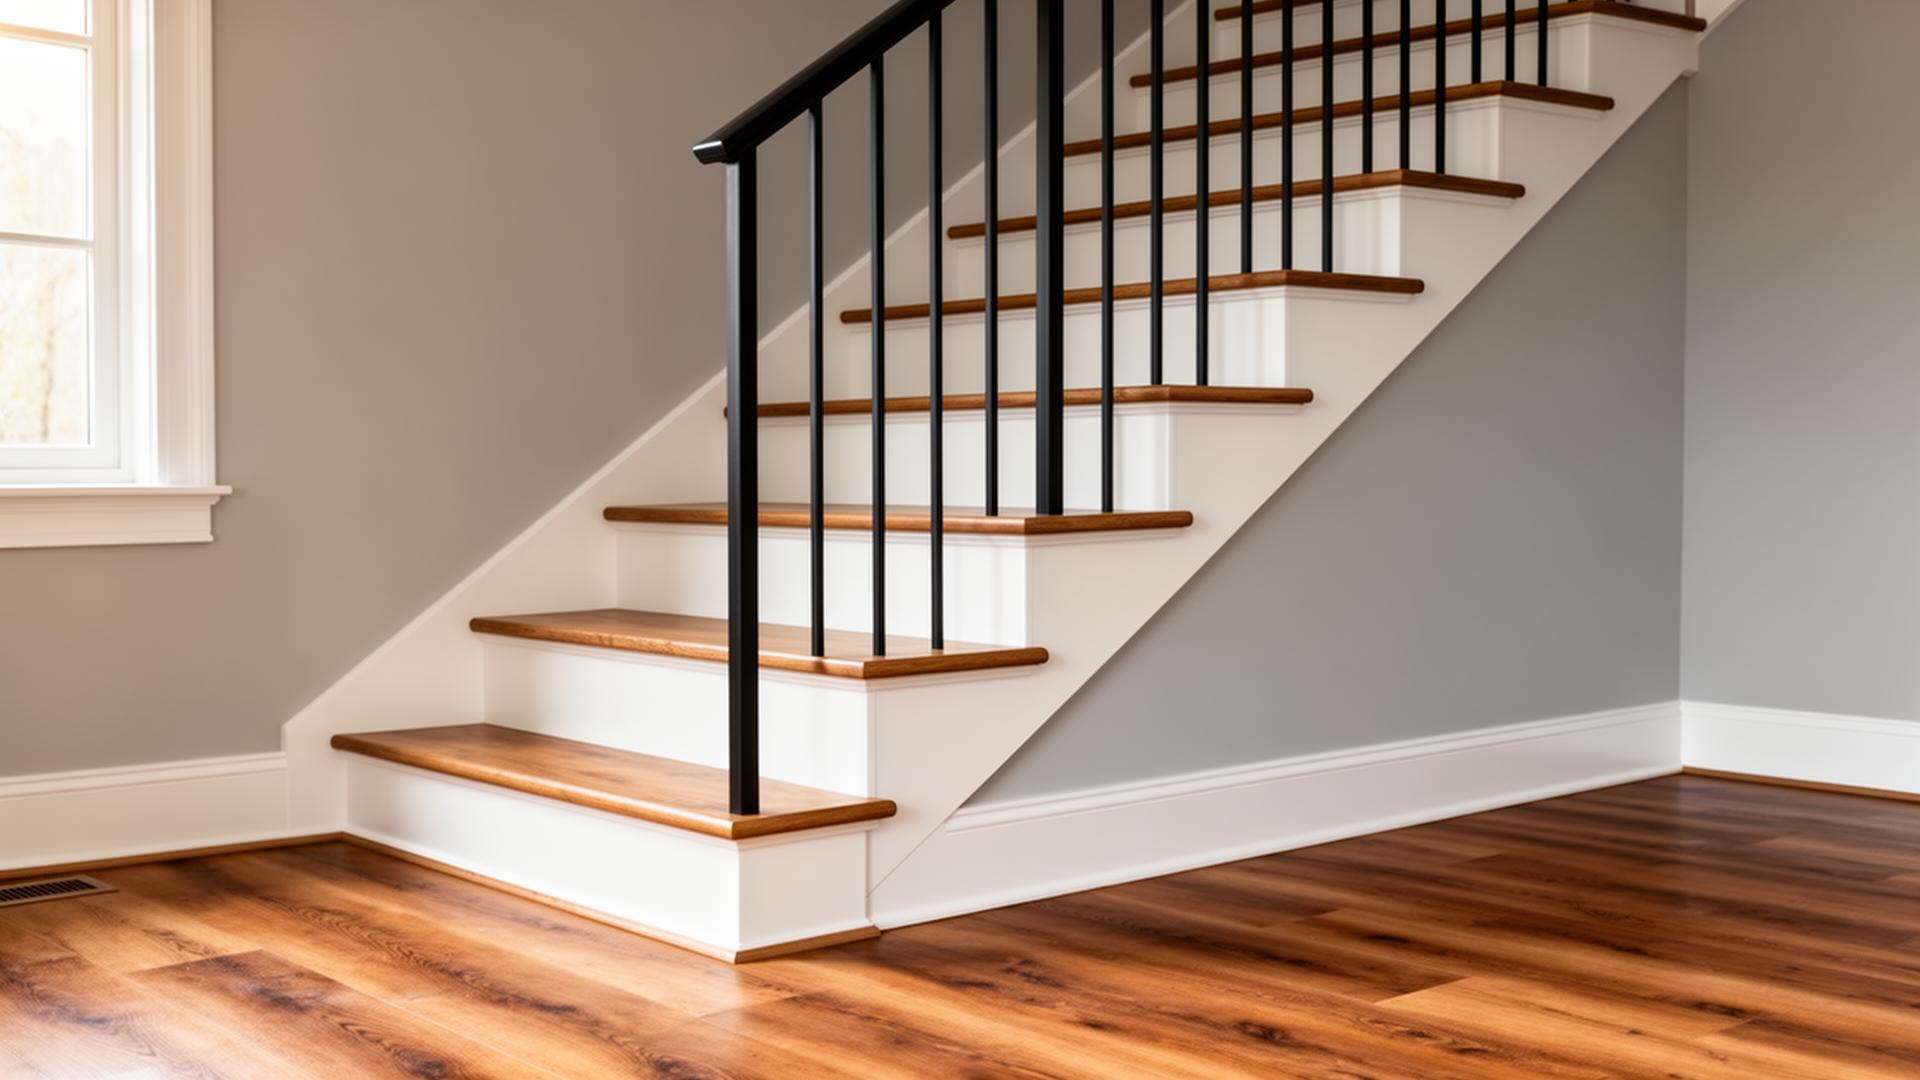
Can LVP Be Installed on Stairs?
Yes — LVP works on stairs, but it must be glued down, paired with matching stair-nose molding, and installed on a solid sub-tread. Here's what it really costs and what to watch out for.
How Do I Choose Between Wood-Look and Stone-Look LVP?
A homeowner's decision guide for picking wood-look vs stone-look LVP — which visual works best in each room, what affects resale, and how to mix the two cleanly.
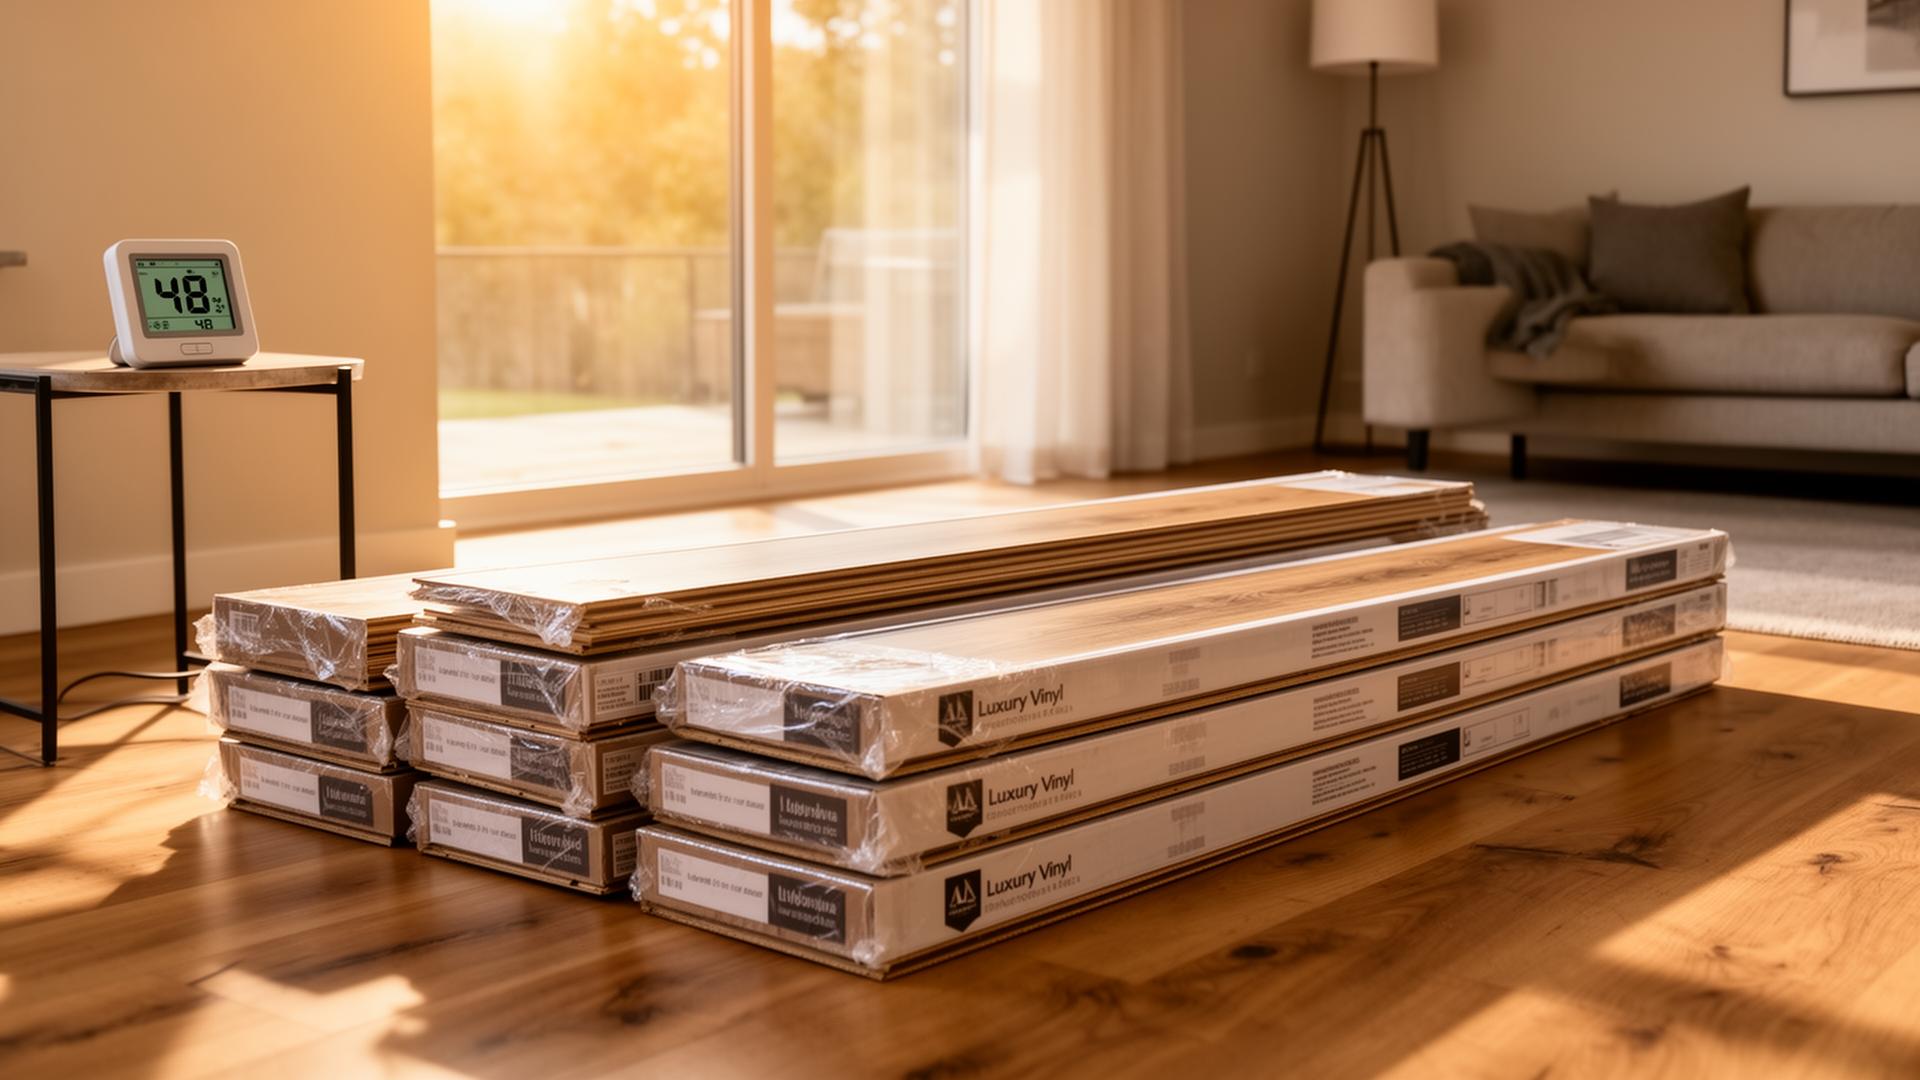
Should I Acclimate LVP Before Installation?
Yes — but not for the reasons you think. Here's what manufacturers actually require, how long acclimation takes, and what really happens if you skip it.