Why Is Subfloor Preparation So Important for LVP?
Skipping subfloor prep is the #1 reason LVP fails early. Here are the 5 failure modes — telegraphing, peaking, hollow spots, moisture damage, voided warranty — and the real cost of skipping it.
Short answer: LVP is thin (5–8 mm), flexible, and floating — it conforms to whatever sits underneath it. Subfloor prep is what separates a 20-year floor from a 2-year complaint call. Skip it and you'll see telegraphing, peaking seams, hollow spots, moisture damage, and a voided manufacturer warranty — usually within the first 18 months. Prep is the single highest-ROI line item on the installation invoice.
The 5 things that go wrong when prep is skipped
None of these are theoretical. They are the failure modes our crews see every week on tear-outs of installs done by someone else.
1. Telegraphing
LVP is too thin to hide imperfections. Every drywall screw left on the subfloor, every dried glob of construction adhesive, every raised seam between plywood sheets — all of it eventually shows through the plank surface as a visible bump, ridge, or shiny spot. Telegraphing usually appears within 3–6 months as the planks settle and traffic compresses the wear layer over the high point. It can't be fixed without pulling the floor.
2. Peaking and gapping at seams
LVP click joints are precision-engineered to lock in a single plane. If the subfloor is wavy beyond the manufacturer's tolerance (typically 3/16" over 10 feet — see how pros ensure LVP planks are level), every footstep flexes those joints up and down. Within months the seams either peak (edges rise above the plank face) or gap (joints separate). Once a click lock chips, it never re-seats.
3. Hollow spots and crunching underfoot
A low spot in the subfloor leaves an air pocket under the plank. You'll hear it the first time you walk across — a hollow tap, sometimes a gritty crunch as the plank deflects into the void and back. Beyond the annoyance, that repeated flex fatigues the click joint and the wear layer at the same time. Hollow spots are one of the top three complaints in LVP warranty filings.
4. Moisture damage and mold
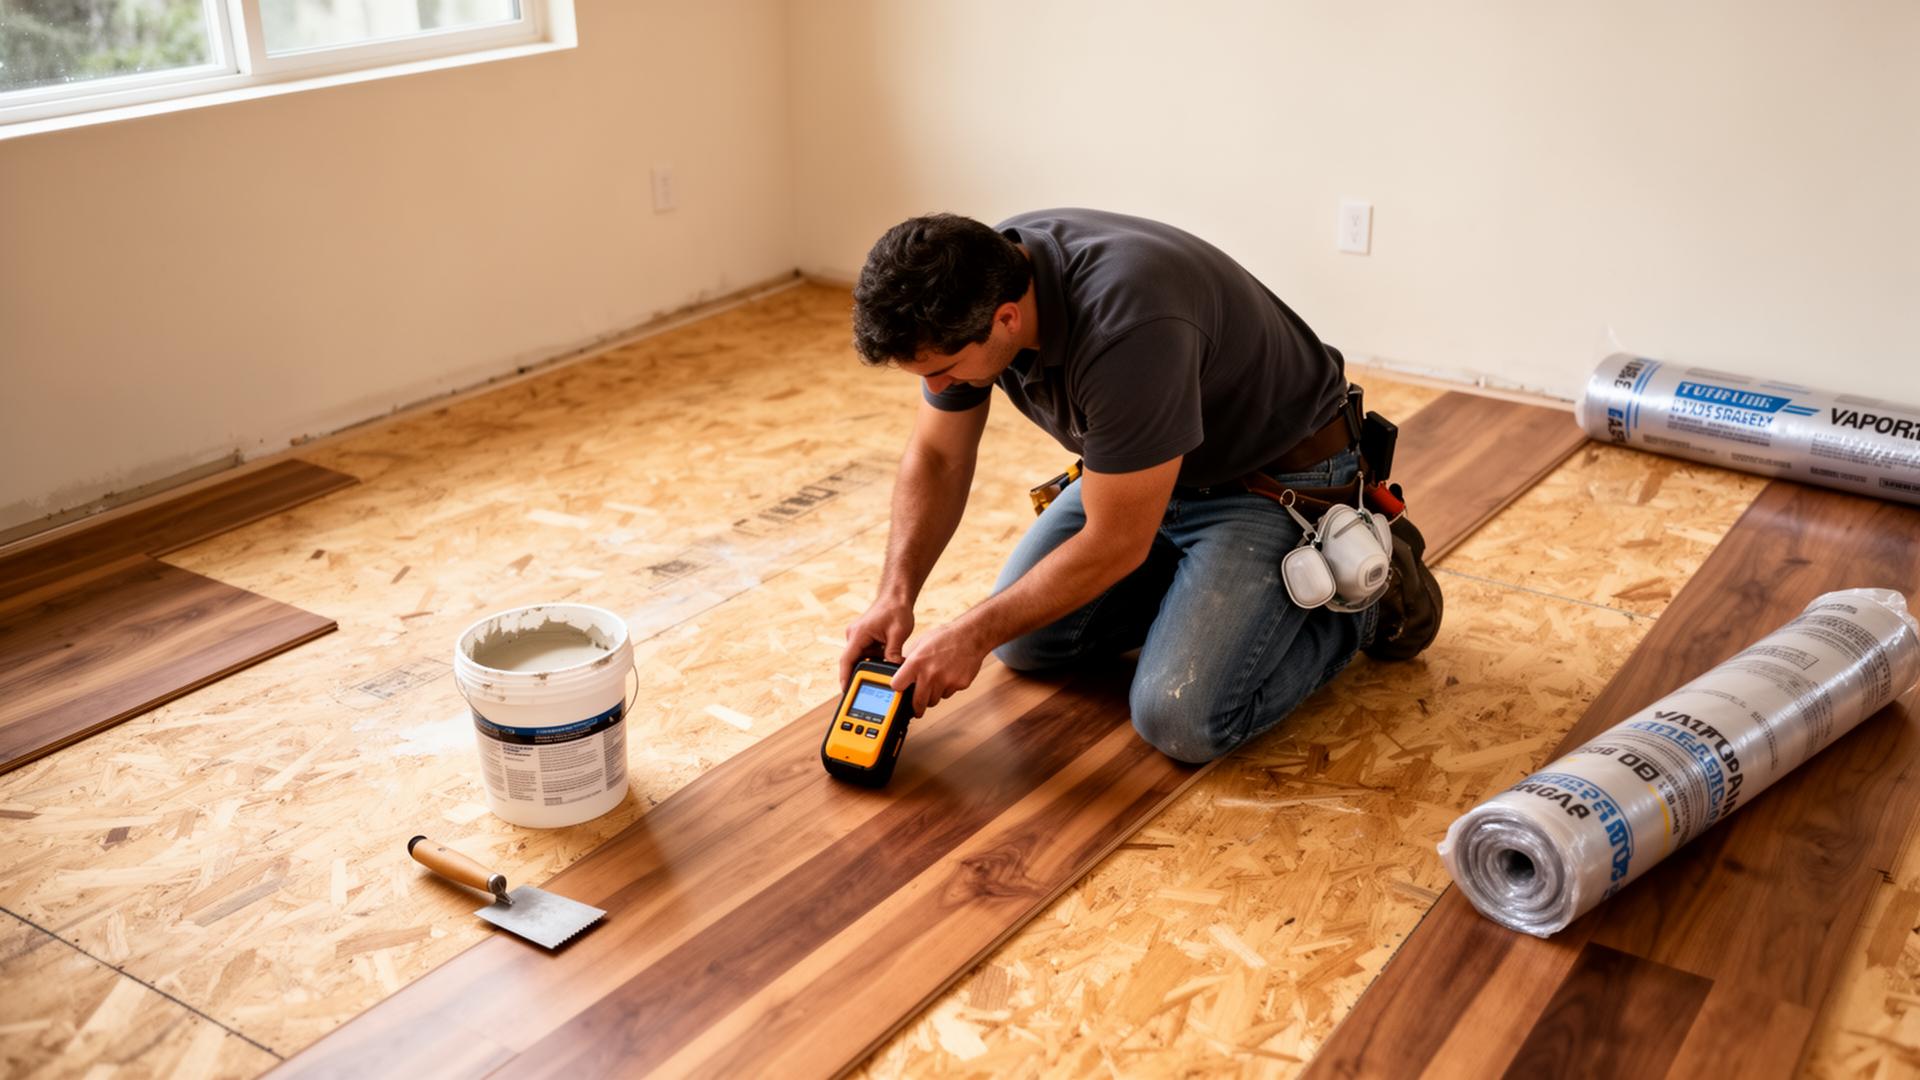
On concrete subfloors, this is the big one. Concrete is permeable — moisture vapor moves up through the slab continuously, especially on grade and below grade. LVP is waterproof from the top, which means any vapor coming from below has nowhere to go. Without a properly installed vapor barrier and a documented moisture reading (calcium chloride or relative humidity probe), you get cupping at the edges, adhesive failure on glue-downs, and microbial growth on the underside of the planks. See LVP in basements and wet areas for the full breakdown.
5. Voided manufacturer warranty
This is the part most homeowners don't learn until they file a claim. Shaw, Mohawk, COREtec, Mannington, Karndean, and LL Flooring all require documented subfloor prep — moisture readings on concrete, flatness verification, and proof of an approved underlayment — as a condition of the lifetime residential warranty. If the installer didn't document it, the warranty is gone. Manufacturers reject the majority of LVP warranty claims for exactly this reason.
Why LVP is less forgiving than carpet, tile, or hardwood
Carpet has half an inch of pad underneath that absorbs every subfloor imperfection. Ceramic tile is bedded in 3/8" of mortar that gets troweled flat as part of the install. Solid 3/4" hardwood is rigid enough to span small dips without flexing. LVP has none of those advantages — it's a thin, flexible plank floating on a 1–1.5 mm foam pad, locked together by a plastic click joint that's roughly the thickness of a credit card. The subfloor is the floor's structural support. If the subfloor isn't right, the LVP can't be either.
What "proper prep" actually means
When we quote a job, prep is itemized — never hidden in the labor rate. A complete prep includes:
- Moisture testing on concrete (calcium chloride or RH probe), documented with photos and a written reading.
- Flatness check with a 10-foot straightedge, marking every deviation over 3/16".
- Fastener sweep — pulling or driving every nail, staple, and screw flush with the subfloor surface.
- Patching low spots with cementitious floor patch; grinding humps on concrete; sanding raised plywood seams.
- Vapor barrier (6-mil poly minimum) on every concrete slab regardless of grade.
- Final vacuum — a single grain of grit under a plank is a future hollow spot.
Full step-by-step in how to prepare a subfloor for LVP installation. The homeowner-side readiness checklist lives in is my subfloor ready for LVP.
The cost math: cheap prep is the most expensive thing to skip
Proper prep typically adds $0.50–$2.00 per square foot to a quote, depending on subfloor condition. That sounds like a lot until you compare it to the alternative. A failed LVP install costs:
- $1.50–$2.50/sf to tear out the failed floor and dispose of it
- $2.00–$4.00/sf to buy replacement material (warranty rejected)
- $2.50–$4.50/sf to re-install — including the prep that should have happened the first time
That's $6–$11 per square foot to redo a job, on top of weeks of disruption. Skipping $1/sf of prep to save money on the front end is the single most expensive decision in the entire project. This is also why our quotes look slightly higher than the cheapest one in your inbox — and why our floors are still flat five years later. See the full pricing page for the line-item breakdown, and how to avoid the most common LVP installation mistakes.
How TRU Installation handles prep
Every TRU quote includes prep as a separate, transparent line item — never hidden inside the labor rate. On the install day our crew photographs the bare subfloor, records the moisture reading, marks and corrects every flatness deviation over 3/16", and documents the underlayment used (see underlayment guide). You get the documentation package, which is what protects your manufacturer warranty for the life of the floor. Book a professional measurement and we'll assess your subfloor condition on-site before quoting.
Know your flooring cost in 60 seconds.
Use our published rates to get an itemized estimate — no phone calls, no sales pressure.
Keep reading
All articles →
What Tools Do Professional LVP Installers Use?
The real toolkit pros bring to an LVP install — moisture meters, plank cutters, tapping blocks, undercut saws — and why each one matters for a floor that lasts.

How Do Professional Installers Ensure LVP Planks Are Level?
The industry flatness tolerance for LVP, the tools pros use to find high and low spots, and the leveling techniques (grinding, patching, self-levelers) that keep your floor dead flat.

What Preparation Do I Need to Do Before Flooring Installation?
A homeowner's checklist for the week, day, and morning before flooring installation — furniture, appliances, pets, and what the crew will handle vs. what you should.